Quantcast
Channel: Universal Audio
Viewing all 321 articles
Browse latest View live

Emily Lazar on Mastering Hits with UAD Plug-Ins

$
0
0
“Most of the time, I’m more of a scalpel than a hatchet,” says Lazar. “But sometimes it’s necessary to bring out the big guns.”

Though mastering engineer Emily Lazar may wryly refer to herself as an auditory “input-output machine,” her true role in the studio is far more nuanced and important than such a phrase might imply. In fact, as the final sonic craftsperson to lay fingers on projects for many of the world’s top musical acts, Lazar has played a key role in creating some of the most popular and influential albums of the 2000s.

As the founder and chief mastering engineer of The Lodge in New York City, Lazar’s resume consists of well over three thousand albums, including projects for the likes of David Bowie, Foo Fighters, Sia, Vampire Weekend, Alanis Morissette, Garbage, Lou Reed, Depeche Mode, and many more. She has also mastered audio for numerous movie soundtracks including Training Day, Sound City: Real to Reel, and American Psycho.

Here are Lazar’s thoughts on troubleshooting at the mastering console, the sculpting power of UAD plug-ins, and the philosophy and practice of crafting platinum-destined masters, time and time again.


How would you describe what you do to someone who isn’t really familiar with mastering?
I get asked this all the time. [Laughs.] Normally I start out by saying that a mastering engineer’s job is to make a musical project sound better and to make it viable for commercial release. On the most basic level, the process involves balancing the many different qualities of any project — EQ, compression, volume, editing, flow, and even album sequence. All of those elements come into play when you’re working to create the bigger-picture story for an album.


But beyond that, I also try to facilitate what an engineer, artist, or producer can’t do on his or her own to get a project to where it’s really meant to be. I want to help find a unique and specific sound for an album and tell its story sonically.


So you help give perspective, among other things.
Sometimes the artist's ability to hear where they want a project to go can get lost in the muck and mire of the entire process — focusing on one or two trees instead of seeing the forest. The mastering engineer’s job is to help “fix” any of those little, problematic trees [laughs], and present a bigger picture to the listener. 


At this point in your career, can you tell who produced or mixed a project that lands on your desk, just by listening?
I can. Once you’ve worked with someone for a while, you can hear similarities across their work, though sometimes I will get tracks from producers or engineers who I know that don’t sound like them. There’s always an interesting story there. Maybe they inherited a project midway through and had to take it in a different direction, or some element was recorded in an unexpected way. If I don’t have that information in advance, it’s a fascinating puzzle for me, just trying to figure out what’s happening only by listening to the mix.


“UAD plug-ins give me more options than I’ve ever had before.”

When an album has multiple different producers on each track, as opposed to one producer working on the entire album, does it make your job harder?
It depends on the album and the point at which it gets to me. Sometimes people will spend inordinate amounts of time — years, even — mixing and remixing, before I hear it. At that point, it can be quite focused and refined, which is great, or sometimes it can sound incredibly different from track to track. Maybe over those two years, the producer or artist’s mindset and vibe changed, and the people working on it interjected themselves into the process in ways that wouldn’t have happened if it all had happened at once. It’s all hit or miss, even to the point of knowing whether one song on an album will be up to snuff with the other nine or ten.


When it comes to multiple producers on the same project, however, having that kind of variety can make things interesting and fun for me as an engineer, just because it’s not the same thing over and over again. That said, even a full album coming from the same producer, engineer and mixer, with all of the tracks having been recorded in the same room with the same gear, could still come out sounding totally different from mix to mix.


What role do UAD plug-ins play in your work?
When a project calls for me to rely on plug-ins, they play an important role — and they can sometimes do the job more easily, and with more precision, than my analog equipment. I mostly use plug-ins when I work on stem mastering, stem mixing, or multi-track mixing. With stem mastering in particular, I rely on them quite a bit. I use them to make sure that individual tracks accomplish what they need to before hitting my analog chain.


Can you describe a stem mixing situation?
I’ve had situations where I’ve been in a session with the mixer, artist, producer, etc. and someone says, “You know, we really didn’t achieve what we wanted to with that that kick drum. It’s not functioning the way it is supposed to in the mix.” If we are lucky enough to have stems of the mix to open up, I can try to help figure things out on the spot. It definitely doesn't happen on every project, but it’s a rewarding and helpful process when it does — clients can come to me feeling completely psyched about a mix that they and the label have become attached to, but if there’s just one element that’s not right, a vocal that’s just too loud or not sitting in the mix, it’s great to be able to go in and make adjustments on the spot.


And you use UAD plug-ins to help?
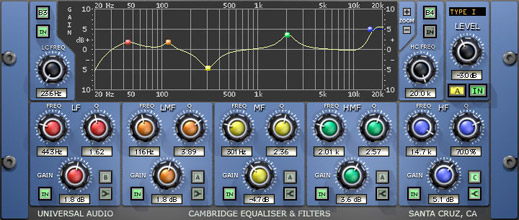
Yes. I use all sorts of UAD plug-ins depending on the need. I really like the Precision Multiband Compressor plug-in, the Fairchild Tube Limiter Plug-In Collection, the EMT® 140 Classic Plate Reverberator, the Neve 1073 Preamp & EQ Plug-In Collection, and the Pultec Passive EQ Plug-In Collection. I also use the SSL G Series Bus Compressor plug-in quite a bit.


Even though I have the original analog units for a lot of these things, sometimes the overall stability of the plug-ins makes them a really great choice in the mastering room. Often, I use them for subtle adjustments, but other times, I make substantive creative moves like using tape emulations and enhancers to really transform a sound or a particular track. Generally speaking, I like a subtle approach — I greatly respect the work of the amazingly talented mixers that I get to collaborate with. Most of the time, I’m more of a scalpel than a hatchet. That said, sometimes it’s necessary to bring out the big guns.


Can you elaborate?
For example, sometimes people are working in environments in which they are not completely familiar and they can’t hear the full extent of a song’s low-end frequencies while they are working, and, as a result, don’t even realize those frequencies are there. In that sort of situation, I have to bring out the low-end hatchet and, artfully, attempt to chisel them out and get rid of the gunk.


In situations like that, I’m very grateful to have access to UAD plug-ins. They give me more options than I’ve ever had before. More importantly, they’re also really musical sounding. I love analog gear, but I also really dig digital gear that sounds great, and it’s amazing to me that Universal Audio has been able to emulate the sounds of these legendary boxes in such a spot-on way.


What advice would you give someone who is getting to know the UAD Precision Multiband Compressor plug-in?
It's a powerful tool, but use it with subtlety and be as thoughtful as possible with your knob-twisting, as opposed to just randomly tweaking something out of frustration or as a result of being distracted. Focus on compressing the elements of the mix you’d like to hear expanded.


Another thing is, if you place an EQ in the signal chain directly before the multiband compressor, then you get into territory where you can sculpt and paint with a huge range of colors. Again, if you use them sparingly, plug-ins can create incredible depth and movement where there wasn’t any — you can really wake up a mix and bring it to life.


And what if you get a really problematic mix — for example, one with way too much bass, like you mentioned earlier?
The best way to achieve a great master is to start with a great mix, so I start by having a dialog with my clients and asking if they know where the problem came from and if it can be fixed in the mix. If not, then I have to start manipulating things. You can still end up with a great master that way, but it’s certainly harder. Again as an example, if we’re talking about a bass overload problem in a stem mix situation, I would probably start by trying to isolate where the excess bass is coming from and go from there. It might actually be coming from multiple sources.


“Digital software and editing can be great tools, but they can also be a bit of a Pandora’s box,” says Lazar.
“It’s part of my job to help decide, and communicate, when Pandora’s box needs to close.”

Sometimes there will be crazy low end coming through a vocal mic — or any other mic, for that matter — and if you don’t realize it’s there, suddenly everything is swallowed up by it. If I’m able to go through the tracks and find where the offensive frequencies are located, I can start figuring out the best ways to control or even remove them. Then the fun starts when I can start shaping the mix so you can hear the parts that you want to hear and not the parts that you don’t.


It sounds like you work collaboratively, rather than clients just dropping off a hard drive and you handing them the finished project a week later.
Originally, I was an artist and I am a still a songwriter. In addition to mastering, I also enjoy mixing and I’ve been involved in producing, writing string arrangements, you name it. I think my background as a musician and an engineer helps me to understand the journey that the artist, engineer, mixer, producer all endure on the way to making a final product and the dialogue between all of these people is essential.


Even if a client cannot be there physically in the session with me, my approach remains a very collaborative one. I’ve never viewed the mastering process as a “my way or the highway” process, and thankfully some of my clients have been known to submit notes that rival novellas alongside their mixes when they are unable to attend the session.


Other times that dialog may very well begin with someone saying, “I love what you did on the Foo Fighters’ album. Do your thing.” That’s fine, and certainly creates some context for me, but I want to dig deeper and understand what about that particular record stood out and how I can bring those qualities to this new project. I’m not shy — if I think of something, I’ll offer it and do it — but at the same time, if I’m working with you, I want to know, in your heart of hearts, what you’re dreaming of and hoping for with your album.


I tell anyone who works with me that he or she can sit at the console, twist any knobs, and be in the driver’s seat when listening and A/B-ing during playback. I don’t want clients to feel that I’m controlling the listening experience. I want them to feel that they’re getting what they want out of the music — and that I’m working my ass off to get there. My job is to facilitate, not dictate.


How do you know when a project is done?
While my role includes doing whatever a client and project needs, my role also includes saying when I don’t think something is necessary. Digital software and editing can be great tools, but they can also be a bit of a Pandora’s box — especially with the ability to instantly recall mixes. It’s part of my job to help decide, and communicate, when Pandora’s box needs to close.


For more on Emily Lazar, visit thelodge.com.

Photo Credit: Becky Yee


The Legacy of the 88 Series Neve Console

$
0
0
The 88RS at Skywalker Sound in Marin, California.

UPDATE: With the release of the new and improved Neve 88RS Channel Strip Collection, we thought it would be cool to take a look back. When UA first embarked on modeling the 88RS console, we visited Skywalker Sound to get up-close-and-personal with Neve's "ultimate analog console."

Primarily designed for the rigors of film scoring and surround mixing, the AMS-Neve 88R/RS (the 'S' indicates improved scoring capabilities) recording console debuted at the 109th AES convention in Los Angeles and began appearing in studios in 2001. It was the first new Neve console design available in over twenty years. Considered the ultimate console for modern features and reliability, the 88 Series is also heralded as one of the best-sounding large format consoles ever built —not only by the film community, but by audio veterans as well. During the development of the Neve® 88RS Channel Strip Plug-In, I was able to view the actual 88RS in action at Skywalker Sound in Marin.

Large Format Fever

Around the late 1970s, the large format console as we know it began to appear. With the advent of the Integrated Circuit, channel count and routing flexibility were much improved over designs of the past and automation was finally a reality. Companies like SSL, Harrison, and Trident were common names in the major studios. SSL arguably dominated the large format console market for well over a decade with a line of highly intuitive, reliable, and full-featured designs that set the bar for every other company.

In the late '90s, AMS-Neve’s Robin Porter and his team were carefully designing the company’s return to the top of the console market. Neve conceived a large-format desk that claimed superiority in every way to the competition, and even harkened back sonically to the beloved designs of the early Neve company. The highly popular 88RS was the result.

Prestigious Pedigree

The 88 Series has found a home in some of the finest rooms and scoring stages around the world, including Ocean Way, Abbey Road, AIR, The Village, Sony Pictures, 20th Century Fox and Skywalker Sound studios. The 88 series is the tool that the big boys have always wanted, as proven by its success. Granted, the 88R/RS is something mere mortals like you and I will probably never have in our project studios. However, it should be noted that the Neve 8801 is a current Neve channel strip product that has the same key features and sound as its big brother with an acceptable footprint on the rack and on the wallet.

Channel Features

The 88RS was built with surround recording and mixing in mind and its routing and automation features are excellent. While we could spend pages focusing on the endless features of the 88R/RS, the scope of this article is on the EQ and dynamics sections of the recording/mix channels. Spending some time with the console with Leslie Ann Jones at Skywalker, it was clear to me that Neve’s emphasis was on sonic performance and flexibility. In some respects, the 88 series borrows from its earlier predecessor, the Neve V Series consoles, in terms of features and layout of the EQ and dynamics.

The cut filters of the Neve 88RS. 

Cut Filters

Working your way down the signal chain of the channel, the first section found is filtering. The cut filters are 12dB octave lowpass and highpass filters, and are engaged by pulling the knob out.

Next, the VCA-based dynamics section provides a gate/expander as well as a limiter/compressor, each with its own dedicated enable/disable switching. This section is internally side-chainable to the EQ section to allow de-essing or similar side chaining techniques with the “SC-EQ” button.

Dynamics section of the 88RS.

Gate/Expand

Standard gate controls such as threshold and release are there, with a broad range of settings. “Range” controls the gain difference between the gated and non-gated signal, while “Hysteresis” makes the gate less susceptible to “motorboating” by making the threshold change depending on whether the gate is off or on. For expander capabilities, the user turns the threshold fully counter-clockwise for a fixed 2:1 expander. Pulling out the release knob to “INV” (invert) allows keying from an external source.

Limit/Compress

The limit/compress section also has standard threshold and release controls with a broad range of settings, including a very pleasing auto release, accessible by turning the release control fully clockwise. The ratio knob has a range of 1:1 to infinity, and a pull control that allows a faster attack time. Lastly, the 30dB makeup gain knob features a pull control, which engages a hard knee setting.

The 88RS EQ section.

EQ

The EQ section of the 88RS provides 4-band parametric equalization, with overlapping frequency ranges (LF 33-370 Hz, LMF 190 Hz-2 kHz, HMF 0.8-8.7 kHz, HF 1.5-17 kHz). The LF and HF bands are switchable peak or shelf filters, while the LMF and HMF bands add a flexible Q control. The equalizer section can be switched before or after the dynamics section.

With its endless list of features and the renowned Neve sound, the 88 Series has made its mark on music professionals throughout the world, and has certainly made remarkable advances on previous large-format consoles.

Here are some choice quotes from users:

“The 88RS is truly the next level of aural quality and console flexibility. … The sonic quality of the console is unbelievable.” – Leslie Ann Jones, Skywalker Sound.

“I sat down and mixed on the 88RS and I just fell in love with it. I can say without reservation that the 88RS is the finest sounding analog console made today.” — Allen Sides, Ocean Way.

“Neve consoles are the Rolls Royce of the industry. … When it comes down to it, the Neve has the edge on any other.” – Sir George Martin.

Processing the 2-Bus with UAD Powered Plug-Ins

$
0
0

Ben Lindell is a NYC-based producer/mixer who has worked with artists such as 50 Cent, Amanda Brown, MGMT, and Wale, among others. In his latest tutorial from Puremix.net, Lindell shows how he uses the power of UAD plugins to bring a mix to life with 2-bus processing.

Processing the mix bus — or 2-bus — can be a touchy subject as it rides the fine line between the mixing and mastering process. Every mix engineer has their own preference, and to each their own, but my personal preference is to use 2-bus processing to help me bring my mix as close to a final product as possible.

An added benefit of 2-bus processing is it allows me to do less processing on the individual tracks, leaving more room for dynamics, while simultaneously gluing together my mixes in a pleasant way. I find that this 2-bus focused approach speeds up my workflow and allows me to achieve the sound I'm looking for faster, giving me more time to focus on the creative elements of my mixes.

Here is the song “I Know U Know” by Tatiana Owens, produced by EMW Music Group for our charity album Shuffle. Below is a breakdown of the UAD Powered Plug-Ins I used on the 2-bus to shape the track.


I Know You Know


Cambridge EQ Plug-In

This is the first EQ on my mix bus. I refer to it as my "clean up" EQ and I use it mostly to tighten up the low-end. I use the Cambridge EQ first is for its ability to choose between 17 different slopes and of high-pass filters — invaluable for contouring and controlling bass frequencies. All 17 sound different, and every song has different needs down in those regions, so I generally take the time to audition several shapes and frequencies whilst A/B-ing with my reference mixes to get the low-end energy just right before adding 2-bus compression.


FATSO™ Jr./Sr. Tape Sim. & Compressor Plug-In

Compressors can just as easily ruin a mix as they can make it great, so picking the correct one to enhance your mix is essential. UAD has the best variety of stereo compressors, and it's important to learn both the sounds and the capabilities of each one so you know which plug-in to reach for first to achieve the sound your looking for.

The Fatso Jr. works great on this track and adds the perfect amount of punch and glue to the mix. The Fatso in general does a great job of adding a little edge and life to mixes without having to set it to “stun.”


Brainworx bx_digital V2 EQ Plug-In

I've been using this plug-in on virtually every mix I’ve done for the last couple years. It makes identifying and controlling crowded areas of the mix easy — and I'm addicted to the powerful Stereo Width control! This feature is easy to get hooked on, but it's important to resist the urge to go nuts with it. Some mixers and producers crank it way past 125% — making their mixes sound crazy on headphones and studio monitors — but then rendering elements of the mix inaudible and/or distant in more common listening environments. I generally end up with the width between 98%-115%, I love being able to push things slightly to the wide side but I always check myself to make sure I'm not in fact pulling apart my mix and that it sounds better without additional width.


Precision Maximizer Plug-In

Dialing in just a touch of the Shape control is often the icing on the cake that a mix needs. I usually tweak the Precison Maximizer over the loudest section of a song ensuring that I'm not destroying the dynamic range. I’ll turn the Shape control until it’s just a little too much, and then dial it back a touch, keeping it right on the edge of good taste. The additional perceived loudness is easy to get addicted to, and if you’re not careful the track can end cup sounding over-hyped.


Pultec Pro EQ Plug-In

The Pultec Pro EQ adds the perfect hint of a final “smile” to my mixes which again helps me accomplish a "finished" sounding mix more efficiently. Just adding a touch of top and bottom with a Pultec often gives it that last 2% that helps blow my clients away with how good their song sounds mixed. In fact, my goal is to always blow my clients away with how good their song sounds mixed. Whatever it takes to get it there is my responsibility and by paying attention and carefully working my 2-bus processing, I can consistently get that reaction from my clients.


To watch all of Ben's tutorials visit puremix.net.

To download this song and help support VH1 Save the Music Foundation visit emwshuffle.org.

For more information about Ben visit his site and blog at benlindell.com.

Engineer Tony Platt on Capturing Legendary Marshall Tones

$
0
0
“Don’t try to make an amplifier give you a tone that is not there in the first place.” — Tony Platt

Engineer/producer Tony Platt has tracked and mixed some of the most legendary albums ever recorded. Beginning with Bob Marley and the Wailers’ Catch a Fire and Burnin’ albums, Platt went on to work with acts ranging from Sparks, Die Krupps, Buddy Guy, and the Bad Plus — among hundreds of others.

But among his star-studded CV, it’s Platt’s contributions to AC/DC’s landmark albums Highway to Hell and Back in Black that he is perhaps most identified with — particularly the album’s ultra iconic guitar tones. Platt took Angus and Malcolm Young’s primal Marshall roar and gave it a three-dimensional toughness that still packed all of the punch and fury of the group’s earlier records.

So it’s no wonder that UA direct developer Softube enlisted Platt to craft presets for the Marshall Plexi Super Lead 1959 plug-in, using his platinum-approved microphone recipes and vast experience capturing the power and glory of Marshall amps.

Was the Softube Marshall Plexi Super Lead 1959 plug-in the first time you’ve been involved in developing a guitar amp emulation?

Yes — and a very interesting and illuminating experience it was. I absolutely love the attention to detail that everyone at Softube displayed, along with the fundamental understanding about what makes the Marshall Super Lead special in a creative context.

Do you remember the first session that you recorded a Marshall rig?

It would probably be working with Luther Grosvenor, the guitar player from Spooky Tooth when I worked on his solo album, Under Open Skies. Of course Paul Kossoff from Free had a legendary purple Marshall rig that recorded beautifully. Most of the guitarists in those early days had their sound and technique pretty sorted out. My job was choosing the best way to capture that sound rather than having to actually craft it.

Was it daunting trying to capture such a legendary rig?

It was, in the sense of, a “good” guitar sound is really quite subjective and everyone’s personal favorite will be different. Also, capturing “the” sound is also affected by a number of other factors, such as the age of the valves and other components, the matching of the amplifier with the speakers, the difference between the flat front and sloping front cabinets, the room it is in, the guitar being used and most importantly, the player.

What are the inherent challenges of capturing such a high-power, high-volume amplifier?

The most difficult aspect is capturing the power, but retaining the detail. Getting the right sound from a Marshall doesn’t necessarily require the brute force of turning it up all the way. In fact, doing that is likely to be unrecordable. The trick is finding that spot at which the amplifier — and the space it inhabits — begins to really “sing.”

Do you find Marshalls to be useful for tones other than heavy crunch?

With the right guitar and the right Marshall amplifier you can get a very wide range of tones from “swampy” gritty tones through to buzzsaw tones. Probably only bright glassy tones are not really in there! I find that the trouble usually begins when you try to make an amplifier give you a tone that is not there in the first place.

One of the coolest things about the Marshall Plexi Super Lead 1959 plug-in is its Channel Strip, featuring a mixer with your microphone recipes — Dynamic, FET, and Valve. How do you determine what mic setup you are going to use?

For me, it’s all about the context in which the part is going to be used. For example, if the guitar is a smaller part of a blend of instruments and you don’t want it to take up much room in the mix, then using the right dynamic mic can filter out many of the frequencies and characteristics you don’t want — or need — without having to use EQ or compression.

Similarly, the use of a good valve condenser mic on a loud amplifier can provide a type of compression that just isn’t available any other way. The valves will add to the richness of the low end, while the FET mic will often deliver smooth top.

In general, positioning the microphones to capture the frequencies they are best at and then combining them to balance the texture you want is so much more effective than just using an EQ.

Platt miking-up the Marshall rig used to emulate the Marshall Plexi Super Lead 1959 plug-in.

The tones you helped track for AC/DC’s Back in Black and Highway to Hell are some of the most iconic Marshall tones ever recorded. Did you have a lot of amps to choose from?

No, we didn’t have that many amplifiers — about 4 or 5 as far as I can remember and around the same number of cabinets — of course this gives you quite a few possible combinations.

How did you decide on the various combinations?

We simply fired up each amp/cabinet combination and I made notes about their particular characteristics. That way, for each rhythm part and solo for each song, I could make a very informed guess about which combination would be best. There are no layered guitars on the AC/DC albums I worked on — just two rhythm guitars up to the solo — and then Angus would play a second rhythm after the solo so that the intensity didn’t drop once the solo had finished.

Do you ever use different combinations of Marshalls together when tracking?

I certainly do! Combining amplifiers to access different parts of the total sound has always seemed, to me, to make total sense. I do that a lot when recording bass guitars, in fact. I record a big bass amplifier for the low end and use a guitar amplifier — often a Marshall — to sharpen up the middle and high frequencies and give a little crunch.

When trying to dial-in that iconic Marshall power, is there an element that people tend to overlook?

Making sure that the room isn’t introducing unwanted elements is an aspect often overlooked. If you get the level, mic choice, and mic positioning, then the natural compression that will encourage contributes to the power of the sound as well.

You have mentioned that some techniques you used when you tracked Bob Marley’s Catch a Fire and Burnin’ albums have informed your heavy rock recordings, and vice-versa. Can you elaborate?

Mostly in the use of cross microphone leakage to “glue” the overall sound together, as well as the use of ambience to create perspective. Also, the elasticity of the bass sounds which can help give a mix something to sit on.

One of your signatures is creating an ambient space around the guitars in a mix. Do you ever use our Ocean Way Studios plug-in?

The Ocean Way Studios plug-in is one of my favorites! I was fortunate to record in Ocean Way back in the ’80s and when I first tried the plug-in it was really quite uncanny. Straight away I recognised the tone and timbre of those unique rooms.

What are some of your other favorite UAD plug-ins for mixing guitars?

I really like using a little EQ from the Neve 1073 Preamp & EQ Plug-In Collection and if I want a touch of compression the Fairchild Tube Limiter Plug-In Collection works like a dream, keeping the toughness but not taking away the bite. Of course the API Vision Channel Strip plug-in gets a lot of use along with the API 560 EQ from the API 500 Series Collection if I need to pick out a particular frequency to lift or cut. Solving phasing problems with the Little Labs® IBP Phase Alignment Tool plug-in is so easy and I do like what the Summit Audio TLA-100A Compressor plug-in does on many instruments, not just guitars.

Visit Tony Platt here.

5-Minute UAD Tips: Neve 33609 Compressor

$
0
0

Renowned for its versatility and ultra-musical nonlinear distortion characteristics, the Neve 336009 compressor was an instant classic upon its debut in 1985. The Neve 33609 Compressor plug-in for UAD-2 and Apollo interfaces gives your tracks the character and cohesion of the legendary hardware. In this 5-Minute UAD Tips video, you’ll learn how to apply the unmistakable sound of the Neve 33609 Compressor plug-in to your mixes.

Producer Neil Mclellan Mixes The Prodigy with UAD Plug-Ins

$
0
0
“Being a great producer or mixer is not about having the fanciest equipment,” says Neil Mclellan

In co-producing and mixing The Prodigy’s powerfully aggressive new album, The Day Is My Enemy, Neil Mclellan not only adds another international hit to his resume, but also cements his status as master of both the vintage analog and cutting-edge digital realms.

Mclellan crafted The Day Is My Enemy using, almost exclusively, UAD plug-ins, and the project is far from his first success with the band, or his first groundbreaking implementation of those digital tools.

Beginning with 1995’s Music for the Jilted Generation, the New York musical polymath has helped with production, mixing, and engineering on every Prodigy album, including hits like “Firestarter” and “Breathe.” He has also worked with artists ranging from Madonna to Nine Inch Nails and, more recently, Mclellan has remixed acts and Dj's including St. Lucia, Carl Cox, Saha, and a just-completed collaboration with Phil Hartnoll and Shepard Fairey.

In between records, Mclellan also co-founded and was the creative director for the New York production house, The Lodge Music and The Station, and he has produced and written music for clients like Nike and BMW.

Here’s what Mclellan had to say about the UAD plug-ins behind The Prodigy and how to start your own UAD-fueled creative fires in the studio.

Can describe your history with The Prodigy?

I’ve worked on most of The Prodigy records. Liam Howlett [Prodigy keyboardist and composer] is my best mate. We go way back, and what happens in the studio between us is quite amazing. We have this rapport where we instantly know what the other wants. I’m able to read between the lines and get things going quickly where it might take someone else a very long time to nail a certain sound, if they get it at all. We’ve been working together for over twenty years now and, minus one or two other people, I’m the only one who’s worked with Liam on mixes and such. It’s a wonderful partnership, from a personal standpoint, and a complete privilege to work with someone of his calibre.

What was your hardware setup for The Day Is My Enemy?

As a modern day producer, I tend to bounce around between working at home to artist houses to programming rooms to, finally, nice big rooms at studios. The journey requires the right hardware to run around with and, since we’re in this weird place of having Thunderbolts coming on line and PCI cards still being relevant, I went ahead and bought a PCI chassis. I have three UAD-2 QUAD Core cards that I stick in there. They’re very versatile and the setup allows me to jump between Thunderbolt and non-Thunderbolt systems. It works seamlessly and has never gone wrong on me.


What are some of your favorite UAD tools?

On the last Prodigy album, Invaders Must Die, I used the Brainworx bx_digital V2 EQ plug-in. That’s one of my go-to plug-ins. I’m also in love with the Massenburg DesignWorks® MDWEQ5 Parametric EQ plug-in. I use it if I really want to get some rude poke on something. The UA 610 Tube Preamp & EQ Plug-In Collection is also fantastic, especially when it comes to overdriving things.

The Manley® Massive Passive EQ is also very good, but very subtle. You have to really know what you’re doing, both in real life and in the plug-in version as well.

The SPL Transient Designer plug-in is another one that I’m absolutely in love with. The beauty of is is that you can use it for the opposite of its intended purpose. It can “un-transient” the design, if you like, and this is an incredibly useful tool when I’ve wanted to soften some things to make certain that other sounds really punch through.

It sounds like you’re pretty familiar with the original analog equipment.

I come from a background of having used all of these bits of gear in real life. I’ve spent a great deal of time working in rooms with a real Fairchild to play with, and some Neve 33609s, so I’ve always had a stable of real hardware when I’m mixing. In particular, I’ve done extensive tests with the Neve 33609 / 33609SE Compressor plug-in which I use for parallel compression on all of my drums, and the UAD version is so damn close that it’s incredible. I can get a sound up wherever I’m working and, once I get into the big room with a real unit, I know that the digital version will translate well. A lot of times, I just end up sticking with the plug-in because it’s so close to sounding like the real thing, but it also gives you the versatility of not having to do a recall with physical equipment, which is super handy.

Have you done any other hardware/plug-in comparisons?

I’ve done extensive tests comparing the UAD-2 dbx® 160 Compressor / Limiter plug-in to three different models of 160 hardware. Again, it’s very impressive. Put an 808 kick drum across it and hear for yourself. It’s real.

Are there any specific reverbs that you lean on more than others?

The AMS RMX16 Digital Reverb plug-in is insane. One thing that I always test with any RMX16 emulation is how it works as a backwards reverb. Back in the days of tape, I used to use the real hardware version of the reverb, turn the tape upside down, and record reverbs backwards onto a spare track.

It’s not how you normally use a reverb unit, but I was able to get that wonderful effect thanks to the RMX — you can hear that backwards reverb on the intro for “Firestarter,” for example. So I love to test emulations to see if they do the same thing and I use the UAD plug-in now for all sorts of backwards reverbs. It’s amazingly like the real unit.

“The key to being the best in the studio is to understand basic balance and making a compressor musical.
The rest is all about vibes.” Neil Mclellan.

Do you have any favorite techniques or settings you can share?

I’m a big fan of frequency-dependent compression on vocals. I like being able to tune and tweak things specifically to certain frequencies and compress just to those frequencies. The Neve® 88RS Channel Strip plug-in does that really well.

That said, the Neves are not great at doing really short compression points. You hear a little click on both the real thing and the emulation, so for really short, wonderful, frequency-dependent compression, I use the SSL E Series Channel Strip plug-in and sidechain EQs to compression. I use that a lot on vocals, just to take out some of the more unpleasant nuances. That’s a favorite strategy of mine.

You’ve spoken before about the Roland Dimension D and “all buttons in.” Can you talk about what that means?

This isn’t in the manual for the physical Roland Dimension D but, if you push in all of the buttons that they have on the front panel — not the bypass, but all of the settings buttons — you get a wonderful effect, and that’s the one that everyone loves to use on their bass lines. If you don’t do that, you end up with a basic, overly chorused effect, but if you do “all buttons in,” it dampens the chorusing effect and something wonderful happens.

It’s a very mild chorus, a bit like having a very short, 12-15 millisecond delay on each side and putting an LFO on there. It’s not like a foot pedal chorus that makes everything into a sponge. It’s much more solid and you can use it on bottom end without it clouding everything up. It also allows you to spread the sound out while still having the bass mono, right in the middle, which is the most powerful way to have bass.

And the UAD emulation does the same thing?

It’s amazing that it replicates the effect very accurately. I get very little phasing, which is one of the things one always has to be aware of.

What advice would you give to someone who is looking to get started producing and engineering?

The key to being the cream in the studio is to understand balance and how to make a compressor musical. I love to teach, and one exercise that I have youngsters, interns, and other students do, is to mix a track without touching the faders. They have to keep everything at zero and only use compression to start getting a balance together where you can feel the music, how you’re ducking some things and expanding others, things like that. Don’t worry about the fancy stuff that early on. That will come later once you’ve got your bread and butter down.

So get your bedrock with balance and compression and go from there.

Yes, that’s all I would concentrate on. When you find that you’ve mastered the art of musical balance, you can start bringing space into your mixes where otherwise there wasn’t any. That’s the art, knowing when an instrument needs to come forward and go back into the background and how to make your mix breathe — and that’s primarily through balance and compression.

Any final words of wisdom?

Being a great producer or mixer is not about having the fanciest equipment. Recently, I was in Russia and I saw kids who didn’t even have keyboards to make music on. Instead, they were writing everything on QWERTY keyboards with really rudimentary equipment. I was so impressed by what the music that they were coming up with, though, that it reinforced for me that your limitations, when you’re starting out, are your best friends. Those limitations are going to make you think outside the box, specifically because you don’t have the fanciest toys to work with. So how can you make great music with what you’ve got? Deal with challenges not as brick walls, but more like puzzles. There is always an answer. Limitations can bring out some amazing creativity that you didn’t know you had, so go for it!

UA Musikmesse 2015 - Armin van Buuren Interview

$
0
0

Watch the legendary DJ/producer at UA’s 2015 Musikmesse booth as he and collaborator Benno de Goeij detail how they used UAD Powered Plug-Ins on the track, “Another You" featuring Mr. Probz.

Writer(s): Armin van Burren; Benno de Goeij; Dennis Stehr; Niels Geusebroek
Publishing through: Nimra Publishing (Cloud 9 Holland Music Publishing)/ Left lane Publishing (BMG Talpa Publishing)/ BNO Publishing (SONY/ATV)/ Music All Stars Publishing
https://pro.beatport.com/release/another-you/1530414

Mixing Valente Bertelli’s “It Don’t Matter” with UAD Plug-Ins

$
0
0
“The Cooper Time Cube Mk II Delay is a real dark horse plug-in with endless magic,” says Bertelli

Valente Bertelli is a recording artist and producer based in Los Angeles. Here, he breaks down the track "It Don't Matter" from his latest album, Music For Rooftops.

“It Don't Matter” is a track that I had lying around for quite a long time. Originally it was mostly soft synths and guitar, but after recording at Aaron Embry's studio (an amazing artist and keyboard player in his own right), it became a bit of a beast of multiple ideas sandwiched together.

I had a clear vision of what I wanted to get out of the track emotionally, but there were too many elements to balance all of it out. To help with some of the finishing mixing issues I was having, I called on the help of three good friends, Joel Newman, Appu Krishnan and Adam Samuels. Here's the finished track.


It Don't Matter

Baking the Backgrounds

For this track, the lead vocal and background vocal compliment each other in a way where they need each other to function. So it was important to pop them out and separate them from each other. Cue the Cooper Time Cube Mk II Delay plug-in!


Whenever I have a track in the mix that I want to showcase, but don't want it to overwhelm, I reach for the Cooper.

Here are the background vocals dry:

BG Vox Dry

I wanted the backgrounds as a constantly moving presence. To that end, I added the BOSS® CE-1 Chorus Ensemble plug-in, my favorite chorus.

And here are the backgrounds with UAD plug-ins:

BG Vox Wet

I used the Teletronix “Gray” LA-2A from the Teletronix® LA-2A Classic Leveler Collection to gently squeeze the backgrounds and keep them "tidy." The CE-1 also helps deliver a different timbre than the lead vocal, while also giving the part movement.


Lead Vocal Treatment


I wanted to keep the main vocal loud and proud in the middle.

Here is the lead vocal dry:

Main Vox Dry

For the background vocals, I kept the same setting on the Cooper throughout, as it only appeared in the choruses.

But for the lead vocal, I automated the Cooper Time Cube’s Panning control. During the intro and chorus, with the Wet/Solo engaged, the panning on each side set to 100%. When the line is repeated, it's at 50%. Eventually, when the backgrounds are gone, I bypassed the Cooper completely. Sidenote: sometimes just turning the Cooper on without doing anything to it can really do wonders for a track!

Here is the lead vocal wet:

Main Vox Wet

The vocal was a bit too sibilant, and the Teletronix LA-2A just enhanced that issue, so we put a Precision De-Esser plug-in after the compression — quite unconventional — so we could then EQ things and raise some of the high end without enhancing the sibilance. Therefore, we went for the Harrison® 32C / 32C SE Channel EQ plug-in. The final touches were put on by the 1176 from the 1176 Classic Limiter Plug-In Collection to make it pop even more, and the Neve® 1081 / 1081SE Classic Console EQ plug-ins to make the treble spring out even more. It was all a mostly corrective endeavor, but the emotion in the take was really worth salvaging.


Noise Lead Makeover

I really loved the Noise Lead in this track, but as we were mixing it, it just wasn't popping out. The part brings a bittersweet, off-kilter element to the track that I wanted to have pierce through without becoming harsh.


Here is the part dry:

Noise Lead Dry

To the rescue came the Helios™ Type 69 EQ and the Roland CE-1. I think the Helios 10 KHz boost doesn't get enough love for it's ability to make something stick out without sounding brittle. In fact, I see it as a different flavor of what a Pultec EQ can do.


And here it is with UAD plug-ins:

Noise Lead Wet

I love how the CE-1 can be subtle, but relentless, in its ability to make something pop out of the mix. Whenever I am using chorus, I always think of this analogy: If you have 10 of the same pictures side by side in front of you, but only one of them is gently moving, which one do you look at? Same thing here; just having that element swaying ever so slowly makes it stand out in an unobtrusive way.


Saving the Drums

The drums on this song were quite a problem. We had an amazing drummer, Steve Nistor play on the entire record, but when we got back to my studio to do the mix, it turned out the files for this performance were corrupted, so we had to go back and use the BFD demo drums.

The drum tones soloed were ok, but making them crack and pop out of the mix was not obvious — especially with so many other elements in the mix to compete against. The trick here was getting the details from the main drum track, while getting the compressed aggressiveness from parallel compression.


Here are the drums dry:

Drums Dry

I used an LA-2A set with very low peak reduction, just to shave off gently and in a round fashion, the overall peaks here and there. Then went to town with both a Trident® A-Range Classic Console EQ and a Manley® Massive Passive EQ plug-in, to try and squeeze out as much tone as we could out of the "fake" drums. Then in order to emulate somewhat the Andy Johns' trick of compressing the overheads, I squashed the hell out of the parallel compression channel, using an Teletronix® LA-3A Classic Audio Leveler plug-in. I tried several different compressors here, but for some reason the LA-3A unexpectedly was the winner.


Here are the drums with UAD plug-ins:

Drums Wet

This was a perfect example of trying things which logically would not be the first weapon of choice, so to speak. You can hear how when the snare starts, there is a massive difference both tonally and presence-wise. Of note, is the fact that the parallel compression track is a lot louder than the original one, however the EQing is on the main track, which is what makes all of it possible.


UAD Tones & Techniques featuring the Marshall Plexi Super Lead 1959

$
0
0

The Marshall Super Lead amplifier is the undisputed sound of rock, renowned for its punishing melange of snarl, sustain, smoothness, and raunch.

In this Tones & Techniques video, you’ll learn how to dial-in the Marshall Plexi Super Lead 1959 plug-in for Apollo and UAD-2 products to quickly craft legendary sounds and textures.

Tube-Tech EQ Plug-In Collection

Ampeg SVT Bass Amplifier Plug-In Bundle

$
0
0

Developed by Brainworx, the Ampeg SVT-VR and SVT-3 PRO Bass Amplifier plug-ins offers two flavors of the legendary SVT recipe — exclusively for UAD-2 hardware and Apollo interfaces.

5-Minute UAD Tips: AKG BX 20 Spring Reverb

$
0
0

The AKG BX 20 Spring Reverb plug-in for UAD-2 hardware and Apollo interfaces envelops your sources in the gorgeously dark, dense ambience that only spring reverb can provide. In this 5-Minute UAD Tips video, you'll learn how to create haunting, desolate textures on vocals, soak guitars in dreamy ambience, and add space to drums.

AKG BX 20 Spring Reverb Plug-In Trailer

Mixing Glasser’s “Shape” with UAD Plug-Ins

$
0
0
“No other plug-ins surpass the sound quality UAD-2,” says Van Rivers

Van Rivers (aka Henrik von Sivers) is a Swedish music producer and engineer based in New York City. His production and mix credits include Blonde Redhead, Fever Ray, Matthew Dear, Delorean, and remix credits with the likes of Massive Attack, Lykke Li, Twin Shadow and Bat For Lashes. Originally a techno producer, Rivers' deep connection to electronic music is fundamental to his distinctive sound, and in addition to studio work, Rivers’ CV also includes musical direction for the live shows of many of the projects he’s involved with.

In this Producer's Corner, he details how he used UAD plugins to produce and mix the song "Shape," the lead single from Glasser’s latest record, Interiors.

I started working with Glasser on her debut record, Ring, and did all the musical direction for her live show as well. With her second album, the mission was to create a sound that reflected the architectural themes and metaphors of the lyrics. We tried to create a sonic world where the rhythms, sounds, and instruments make you feel like you enter the space of a surreal dream.

Here is the full version of "Shape.” I think the video gives a visual representation of the sonic experience we were going for in a nice way.


Up-Close Vocal

The lead vocal needed a delicate quality, but it also needed to feel prominent and close to the listener. My trick was to use a combination of different compressors and EQ’s. The 1176 from the 1176 Classic Limiter Plug-In Collection in limiting mode makes the sound come forward and then the Teletronix® LA-2A Classic Leveler Collection in compression mode balances it out, simultaneously giving it a slightly denser feel which I really like.


Here is the vocal dry:

Vox Dry

And here it is with UAD plug-ins:

Vox Wet

The Maag EQ4® EQ plug-in gives it that sweet sheen on top which also brings back some of the delicacy that can get lost while compressing. In addition to the lead vocal track, I added a parallel bus with some more aggressive compression and frequency shaping, the Pultec EQP-1 EQ from the Pultec Passive EQ Collection has such wonderful depth and musicality to it, I tend to use it a lot in my mixes.


Noisy Percussion Glue

Another element that I think makes up the sound of the song is the noise-like percussion sound that holds the beat together. I used a combo of filters and modulation to create movement and width.

Here is the part dry:

Percussion Dry

And here it is with UAD processing:

Percussion Wet

The Pultec HLF-3C plug-in from the Pultec Passive EQ Collection comes first, followed by some shaping with the Harrison® 32C / 32C SE Channel EQ. Third in line is the Moog® Multimode Filter / Multimode Filter SE plug-in — which has the cutoff lightly modulated by the LFO — followed by the BOSS® CE-1 Chorus Ensemble, which gives some nice width and final grit to the sound.


Add Chorus Energy

The chorus of the track features a choral arrangement. The original panned vocals already had a nice sound and width to them.

Here is the chorus dry:

Chorus Dry

And here it is with UAD plug-ins:

Chorus Wet

However, sometimes you just want to squeeze out that last bit of energy to make it sound even bigger. The SPL® Vitalizer MK2-T plug-in is great for just that purpose, especially on vocal busses.


These are just a few examples of how my favorite plug-ins might get used in a song. Listen to the whole Glasser album and you will hear many great examples of sounds that were processed with UAD software. I’m proud of how it turned out, and I think that many of the sonic achievements we made have the quality of the UAD Powered Plug-Ins to thank for it!

5-Minute UAD Tips: Oxide Tape Recorder

$
0
0

The Oxide Tape Recorder plug-in for UAD-2 hardware and Apollo interfaces gives you the clarity, punch, and glue that only magnetic tape can. In this 5-Minute UAD Tips video, you'll learn how Oxide can easily add cohesion to your drum bus, shape bass guitar, and sit electric guitars perfectly in the mix. 


Marshall Legends Plug-in Bundle by Softube

$
0
0

Marshall amplifiers defined the sound of rock. Now you can get three different flavors of the iconic Marshall sound with the Bluesbreaker 1962, Silver Jubilee 2555, and Plexi Super Lead 1959 amplifier plug-ins — complete with impedance-matching Unison™ technology for Apollo audio interfaces. 

Copyright © Authentic Hendrix, LLC 

Used by Permission/All Rights Reserved 

Oxide Tape Recorder Plug-in

$
0
0

The Oxide Tape Recorder plug-in lets you easily inject the warmth, cohesion, and punch of large format analog tape to your tracks with UA's industry-leading magnetic tape modeling. Exclusively for UAD-2 hardware and Apollo interfaces, Oxide puts magnetic tape magic in a simple, affordable package. 

Eventide H910 Harmonizer® Plug-In Trailer

$
0
0

From sci-fi sound design to pop music landmarks from David Bowie and AC/DC, the Eventide H910 Harmonizer is an unmatched creative tool. Now, Eventide and Universal Audio proudly announce the Eventide H910 Harmonizer plug-in, the first and only end-to-end circuit emulation of this legendary processor — complete with all of its analog quirkiness — exclusively for UAD-2 hardware and Apollo interfaces.

UAD Tones & Techniques featuring the Marshall 1962 Bluesbreaker Plug-In

$
0
0

The Marshall 1962 Bluesbreaker plug-in is is the first emulation of the iconic 2x12 combo used on the landmark 1966 album, Blues Breakers with Eric Clapton.

In this UAD Tones & Techniques video, you’ll learn how to dial in the Marshall Bluesbreaker 1962 plug-in to quickly craft legendary sounds and textures.

Learn how to:


- Dial in clean tones chock full of rich harmonics
- Use Unison technology for authentic Bluesbreaker feel
- Tweak the plug-in’s Channel Strip feature for different mic tones

Using Apollo Twin USB with Ableton Live (Full Version)

$
0
0

Here’s everything you need to get going with Apollo Twin USB and Ableton Live on a Windows computer. Set up the driver, configure I/O, learn the Apollo Console, low latency monitoring, headphones and more.

Viewing all 321 articles
Browse latest View live